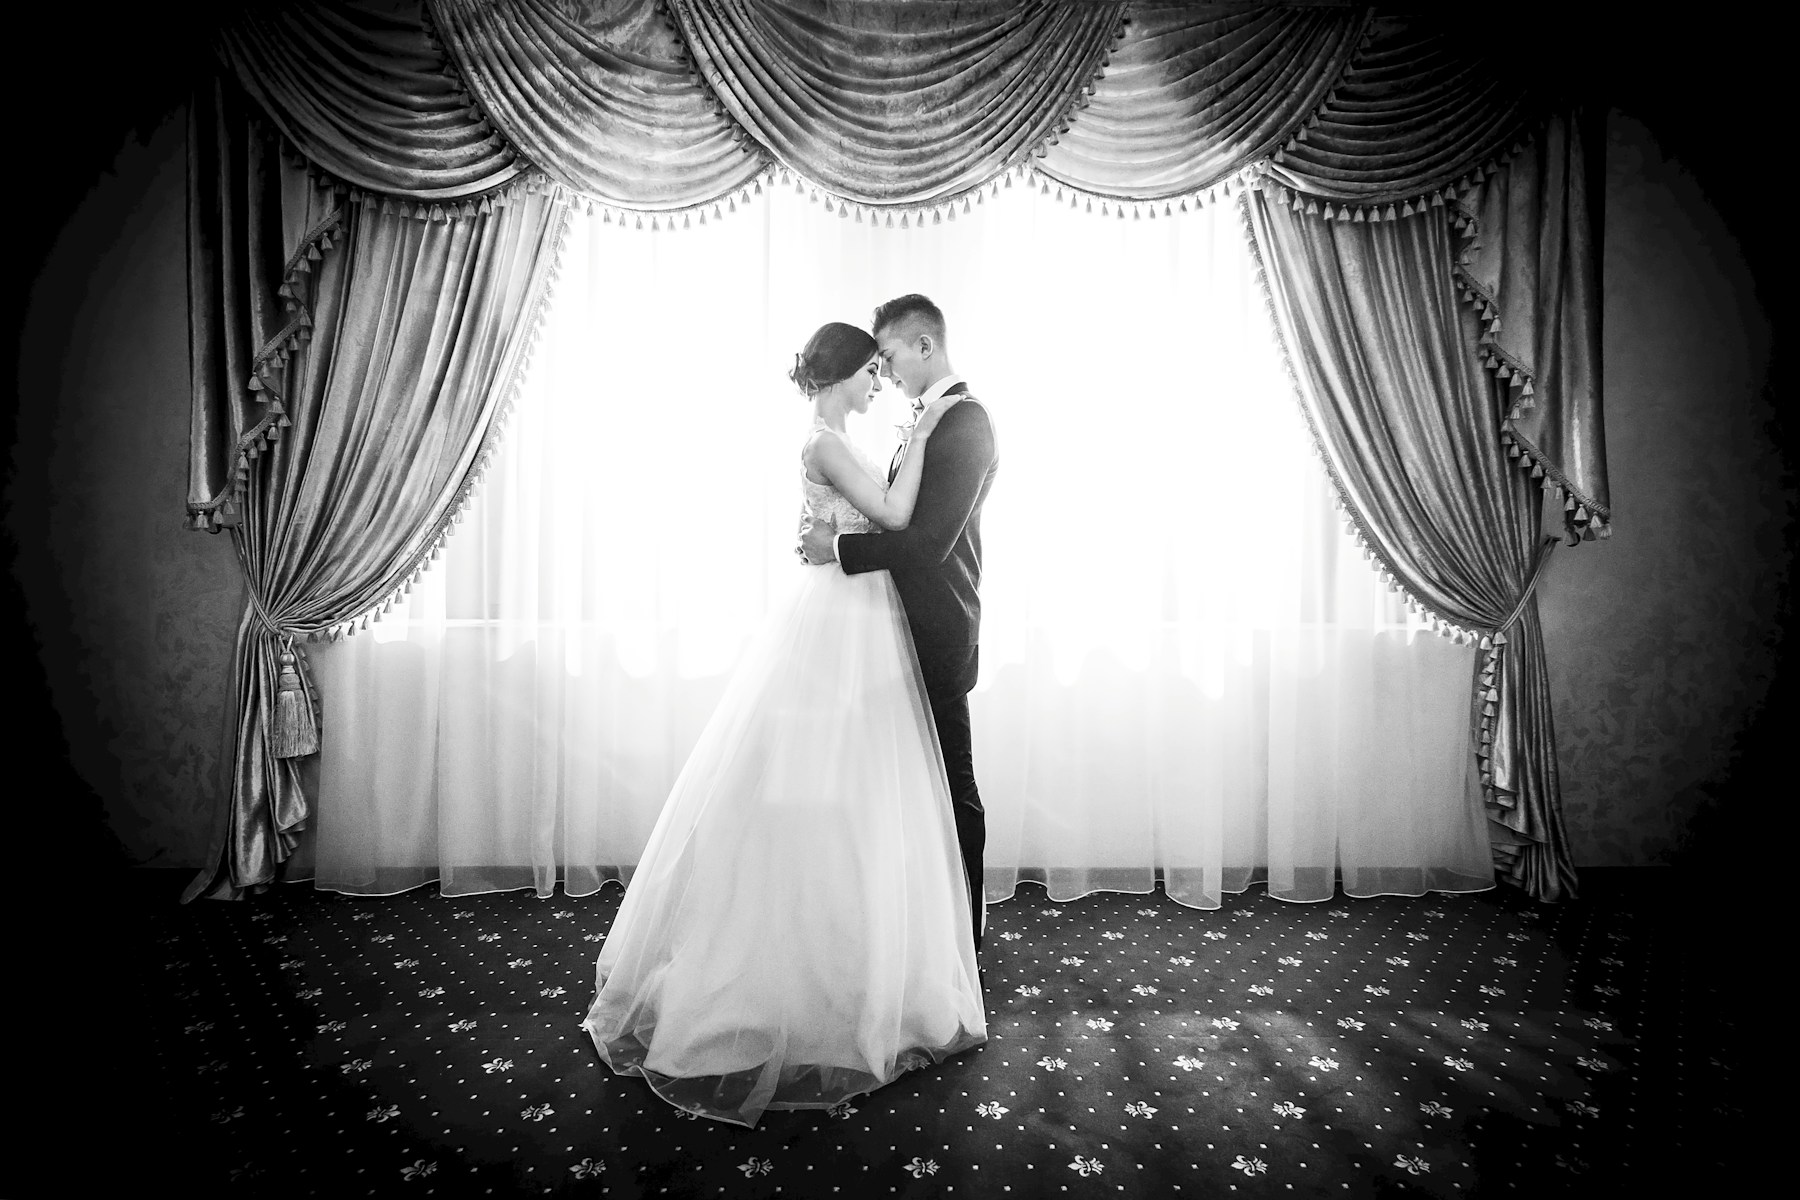
<h1>How To Take Portraits In Natural Light</h1> <div class="howto-guide"> <div class="howto-hero"> <div> <p class="howto-summary">Taking portraits using natural light means using the sun, the sky, and anything that reflects or blocks light, rather than artificial studio lights. This guide will show you how to find and use the best natural light to create stunning photos of people, often without needing any special equipment beyond your camera. It’s perfect for anyone looking to improve their portrait photography, whether you’re just starting out or want to refine your skills for more visually engaging results.</p> </div> <div class="howto-quick-card"> <h2>Fast Answer</h2> <ul> <li><strong>Best Light:</strong> <span>Open shade or Golden Hour light</span></li> <li><strong>Camera Mode:</strong> <span>Aperture Priority (Av/A)</span></li> <li><strong>Aperture:</strong> <span><strong>f/1.8</strong> to <strong>f/4</strong> (for blurry backgrounds)</span></li> <li><strong>Focus:</strong> <span>On the subject's eyes</span></li> <li><strong>Subject Position:</strong> <span>Facing the light or angled to it</span></li> </ul> </div> </div> <div class="howto-stat-grid"> <div><strong>30-60 minutes:</strong> <span>Time needed for a session</span></div> <div><strong>Easy to Medium</strong> <span>Difficulty</span></div> <div><strong>Harsh Shadows</strong> <span>Watch out for</span></div> </div> <div class="howto-prep"> <h2><span class="howto-icon howto-icon-wave" aria-hidden="true"></span>Before You Start</h2> <ul> <li><strong>A camera:</strong> Any digital camera will work – a DSLR, mirrorless camera, or even a good smartphone.</li> <li><strong>A subject:</strong> Someone willing to pose for your portrait.</li> <li><strong>An outdoor or indoor location</strong> with natural light, such as near a window or in a park.</li> <li><strong>Optional: A reflector.</strong> This can be a professional reflector or even a large piece of white card, a white sheet, or foil-covered cardboard to bounce light.</li> <li><strong>Check the weather forecast</strong> for outdoor shoots. Overcast days offer soft, even light, while sunny days require more careful placement.</li> </ul> <div class="howto-callout howto-callout-warning"><strong>Check first:</strong> Always ensure your subject is comfortable and has given their permission for the photo shoot. Discuss their comfort level with different poses and locations beforehand.</div> </div> <div class="howto-steps"> <h2>Step-by-Step Instructions</h2> <div class="howto-step"> <div class="howto-step-body"> <h3>1. Understand Natural Light Quality and Direction</h3> <p>Natural light isn't just "the sun." It changes constantly in terms of its softness (quality) and where it comes from (direction). Knowing this is key to taking great portraits. Soft light creates gentle shadows and smooth transitions, which is usually more flattering for faces. Hard light creates sharp, dark shadows.</p> <ul> <li><strong>Soft Light:</strong> Look for open shade (under a tree, on the shaded side of a building), overcast days, or window light indoors. This light wraps around your subject gently.</li> <li><strong>Hard Light:</strong> Direct sunlight, especially at midday, creates strong shadows. While challenging, it can be used creatively for dramatic effects.</li> <li><strong>Light Direction:</strong></li> <ul> <li><strong>Front-lighting:</strong> Light source is behind you, shining directly on the subject. Can make images flat.</li> <li><strong>Side-lighting:</strong> Light hits the subject from the side, creating interesting shadows and depth.</li> <li><strong>Back-lighting:</strong> Light source is behind the subject, creating a bright rim around their outline. This can be beautiful but can make the subject's face dark if not compensated for.</li> </ul> </ul> <div class="howto-callout howto-callout-tip"><strong>Tip:</strong> Pay attention to the shadows. Soft shadows mean soft light; hard shadows mean hard light. Move your subject around until the shadows fall flatteringly on their face.</div> </div> </div> <div class="howto-step"> <div class="howto-step-body"> <h3>2. Choose Your Location Wisely for Optimal Light</h3> <p>The right location provides more than just a nice background; it provides the right kind of natural light. Think about how the light hits different areas.</p> <ul> <li><strong>Open Shade:</strong> This is a photographer's best friend. Find an area under a large tree, a covered porch, or the shady side of a building. The light here is indirect, soft, and even, which is perfect for portraits. Your subject should be positioned just at the edge of the shade, facing towards the brighter, open sky.</li> <li><strong>Window Light (Indoors):</strong> A large window can act like a giant softbox. Place your subject near the window, allowing the light to fall across their face. You can use a wall opposite the window to bounce light back, filling in shadows.</li> <li><strong>Avoid Direct Midday Sun:</strong> Between roughly 10 AM and 3 PM, the sun is high and harsh, creating strong shadows under the eyes and nose, and causing your subject to squint. Unless you're aiming for a very specific, dramatic look, this time is usually best avoided for portraits in direct sunlight.</li> </ul> <div class="howto-callout howto-callout-tip"><strong>Tip:</strong> If shooting indoors near a window, try placing your subject facing the window for even light, or with the window to their side for more sculpted light and shadow.</div> </div> </div> <div class="howto-step"> <div class="howto-step-body"> <h3>3. Master the Golden Hour</h3> <p>The "Golden Hour" is the period shortly after sunrise or before sunset when the sun is low in the sky. This light is often described as magical because it's soft, warm, and produces long, gentle shadows that add depth and mood to your portraits.</p> <ul> <li><strong>Warmth and Softness:</strong> The low angle of the sun means the light travels through more of the atmosphere, scattering blue light and leaving behind beautiful reds, oranges, and yellows. It's also less intense than midday sun.</li> <li><strong>Directional Light:</strong> The low angle allows for beautiful side-lighting or back-lighting.</li> <ul> <li>For a warm, even glow: Have your subject face the sun.</li> <li>For a glowing outline (rim light): Position your subject with the sun behind them. You might need to use a reflector or slightly adjust your camera settings (expose for the face) to ensure their face isn't too dark.</li> </ul> </ul> <div class="howto-callout howto-callout-tip"><strong>Tip:</strong> Plan your shoot carefully to make the most of the Golden Hour. It only lasts about an hour, so be ready to shoot as soon as the light is right. Use apps or websites to find exact sunrise/sunset times for your location.</div> </div> </div> <div class="howto-step"> <div class="howto-step-body"> <h3>4. Set Your Camera for Portraits in Natural Light</h3> <p>Even with great light, your camera settings need to be correct to capture the scene effectively. Don't be afraid to experiment!</p> <ul> <li><strong>Aperture Priority Mode (Av or A):</strong> This mode lets you control the aperture (how wide the lens opens) while the camera picks the shutter speed. For portraits, a wider aperture (smaller f-number like <strong>f/1.8</strong>, <strong>f/2.8</strong>, or <strong>f/4</strong>) is often desired to create a shallow depth of field, meaning your subject is sharp and the background is softly blurred. This helps your subject stand out.</li> <li><strong>ISO:</strong> Keep your ISO as low as possible (e.g., <strong>100</strong> or <strong>200</strong>) to avoid "noise" or graininess in your photos. Only increase it if your photos are too dark, or if your shutter speed is too slow and causing blur.</li> <li><strong>Shutter Speed:</strong> In Aperture Priority mode, the camera will select this. Just ensure it's fast enough to prevent blur from camera shake or subject movement (generally <strong>1/125th of a second</strong> or faster is a good starting point for handheld portraits).</li> <li><strong>White Balance:</strong> This setting tells your camera how to interpret colours accurately. You can set it to "Auto White Balance" (AWB), which usually does a good job. For more specific warmth, try "Cloudy" or "Shade" settings, especially in Golden Hour, to enhance those warm tones.</li> </ul> <div class="howto-callout howto-callout-tip"><strong>Tip:</strong> Review your camera's LCD screen frequently. Check the exposure (is it too dark or too bright?), focus, and overall look. Adjust your aperture or ISO if needed.</div> </div> </div> <div class="howto-step"> <div class="howto-step-body"> <h3>5. Direct Your Subject and Focus Accurately</h3> <p>Good communication with your subject is crucial for natural-looking portraits. Also, getting the focus right on their eyes is paramount.</p> <ul> <li><strong>Posing:</strong> Instead of rigid poses, encourage natural movements. Ask your subject to walk, look away, laugh, or simply relax. Give them gentle directions, like "look towards the light," "tilt your head slightly," or "imagine your favourite song."</li> <li><strong>Eye Contact:</strong> Direct eye contact with the camera can be powerful. However, looking off-camera can create a sense of candidness or contemplation. Experiment with both.</li> <li><strong>Focus on the Eyes:</strong> In portraits, the eyes should always be razor-sharp. Use your camera's single-point autofocus mode and place the focus point directly on one of your subject's eyes (the one closest to the camera is usually best). If your camera has "Eye AF," enable it!</li> <li><strong>Composition:</strong> While not a primary focus of light, good composition enhances any portrait. Consider the "Rule of Thirds" by placing your subject slightly off-centre.</li> </ul> <div class="howto-callout howto-callout-tip"><strong>Tip:</strong> Take many photos! Digital photography allows for this. The more shots you take, the higher your chances of capturing that perfect, natural expression.</div> </div> </div> <div class="howto-step"> <div class="howto-step-body"> <h3>6. Use Simple Reflectors or Diffusers</h3> <p>Even with the best natural light, sometimes you need a little help to shape it. You don't need expensive gear; common household items can work wonders.</p> <ul> <li><strong>Reflector:</strong> A reflector bounces light back onto your subject. This is especially useful when your subject is backlit or when one side of their face is in shadow.</li> <ul> <li><strong>White reflector:</strong> Use a white card, a white bed sheet, or a professional white reflector. This provides a soft, neutral fill light.</li> <li><strong>Silver reflector:</strong> A foil-covered piece of cardboard or a silver reflector will reflect more intense, cooler light. Use sparingly to avoid harshness.</li> <li><strong>Gold reflector:</strong> Creates warm light. Great for Golden Hour or adding warmth in cooler light.</li> </ul> <li><strong>Diffuser:</strong> A diffuser softens direct, harsh light. Hold a translucent white fabric (like a thin curtain or a professional diffuser) between the sun and your subject. This turns harsh sunlight into beautiful, soft light.</li> <li><strong>Positioning:</strong> Have a friend or assistant hold the reflector/diffuser, or prop it up carefully. Move it around to see how the light changes on your subject's face.</li> </ul> <div class="howto-callout howto-callout-tip"><strong>Tip:</strong> Even a large white wall nearby can act as a giant reflector, bouncing ambient light back onto your subject. Look for bright, neutral surfaces in your environment.</div> </div> </div> <div class="howto-step"> <div class="howto-step-body"> <h3>7. Review Your Photos and Make Adjustments</h3> <p>After each set of shots, take a moment to look at your camera's screen. This immediate feedback loop is crucial for learning and improving.</p> <ul> <li><strong>Check Exposure:</strong> Are the photos too dark (underexposed) or too bright (overexposed)? Adjust your ISO or aperture if needed.</li> <li><strong>Check Focus:</strong> Zoom in on your subject's eyes. Are they sharp? If not, refine your focusing technique or ensure your shutter speed is fast enough.</li> <li><strong>Check Shadows:</strong> Are there any unwanted harsh shadows on the face? Move your subject, change your angle, or introduce a reflector to fill them in.</li> <li><strong>Check Expressions:</strong> Are your subject's expressions natural and engaging? If not, try a different direction or give them new prompts.</li> </ul> <div class="howto-callout howto-callout-tip"><strong>Tip:</strong> Don't be afraid to delete bad photos. It's part of the learning process. Focus on what went wrong and how you can improve for the next shot.</div> </div> </div> </div> <div class="howto-cheatsheet"> <h2>Quick Reference</h2> <table> <thead> <tr> <th>Situation</th> <th>Use this</th> <th>Why</th> </tr> </thead> <tbody> <tr> <td>Harsh midday sun</td> <td>Move to open shade or use a diffuser</td> <td>Softens light, eliminates harsh shadows and squinting</td> </tr> <tr> <td>Flat, dull light (overcast)</td> <td>Look for brighter spots, use a reflector for catchlights</td> <td>Adds contrast and sparkle to the eyes, defines features</td> </tr> <tr> <td>Backlit subject (face too dark)</td> <td>Use a reflector to bounce light onto the face or slightly overexpose the scene</td> <td>Fills in shadows on the face, balances exposure with the background</td> </tr> <tr> <td>Want blurred background</td> <td>Wide aperture (e.g., <strong>f/1.8</strong>, <strong>f/2.8</strong>)</td> <td>Creates shallow depth of field, isolates subject from background</td> </tr> <tr> <td>Subject looks stiff</td> <td>Give gentle, actionable directions; encourage natural movement</td> <td>Helps subject relax and express themselves naturally</td> </tr> </tbody> </table> </div> <h2>Common Problems When You Take Portraits In Natural Light</h2> <p>Even with the best intentions, natural light photography can present a few challenges. Here's how to tackle them:</p> <h3>Harsh Shadows on the Face</h3> <p>This is common when shooting in direct sunlight, especially midday. You'll see dark circles under the eyes, harsh lines under the nose and chin, and unflattering contrasts.</p> <ul> <li><strong>Fix:</strong> The easiest solution is to move your subject into <strong>open shade</strong>. If shade isn't available, try to position them with the sun to their back (backlit) and use a reflector to bounce light back onto their face. Alternatively, use a <strong>diffuser</strong> (a translucent material) to soften the direct sunlight before it hits your subject.</li> </ul> <h3>Subject Squinting</h3> <p>Direct, bright sunlight shining into your subject's eyes will cause them to squint, resulting in unnatural and uncomfortable expressions.</p> <ul> <li><strong>Fix:</strong> Again, move to <strong>open shade</strong>. If you must shoot in bright sun, try having your subject close their eyes and then open them just before you take the shot. You can also have them look slightly away from the direct light source.</li> </ul> <h3>Dull, Flat Light</h3> <p>Overcast days can provide soft, even light, but sometimes it can look a bit flat and uninspiring, lacking contrast or sparkle in the eyes.</p> <ul> <li><strong>Fix:</strong> Look for opportunities to introduce a bit more direction to the light. Even on an overcast day, there's usually a brighter part of the sky; have your subject face it. Use a <strong>reflector</strong> to add a 'catchlight' (a sparkle of light) to their eyes, which adds life to the portrait. You can also add contrast later during editing.</li> </ul> <h3>Blurry Photos</h3> <p>This can happen due to slow shutter speed (camera shake) or inaccurate focusing.</p> <ul> <li><strong>Fix:</strong> <ul> <li><strong>Camera Shake:</strong> Increase your <strong>shutter speed</strong>. If you're in Aperture Priority mode, you might need to increase your ISO to allow for a faster shutter speed without underexposing.</li> <li><strong>Inaccurate Focus:</strong> Make sure you are using <strong>single-point autofocus</strong> and placing the focus point directly on your subject's closest eye. Avoid refocusing after you compose the shot if your subject moves, as this can shift your focus point.</li> </ul> </li> </ul> <h3>Incorrect Colour (White Balance Issues)</h3> <p>Sometimes your photos might have a colour cast – too blue, too orange, or too green – making skin tones look unnatural.</p> <ul> <li><strong>Fix:</strong> Adjust your camera's <strong>White Balance</strong> setting. While Auto White Balance (AWB) is generally good, sometimes you'll get better results by manually setting it to "Daylight," "Cloudy," or "Shade" depending on your environment. If you shoot in RAW format, you have much more flexibility to correct white balance in editing software later.</li> </ul>
<h2>Advanced Tips for How To Take Portraits In Natural Light</h2> <p>Once you're comfortable with the basics, here are a few ways to push your natural light portraits further and add more creativity to your work.</p> <h3>Embrace Different Times of Day</h3> <ul> <li><strong>Blue Hour:</strong> This is the period just before sunrise or after sunset, following the Golden Hour. The light is soft, cool, and creates a peaceful, dramatic mood. It's excellent for urban portraits with city lights complementing the ambient blue tones.</li> <li><strong>Overcast Days:</strong> Don't just settle for flat light. Overcast conditions offer a giant, natural softbox, which means very even and soft light. This is perfect for detailed close-ups and situations where you want smooth skin tones without harsh shadows.</li> <li><strong>Rainy/Stormy Weather:</strong> Dramatic skies and moody light can create unique and powerful portraits. The diffused light from heavy clouds is often very soft. Just protect your gear!</li> </ul> <h3>Use Environmental Elements Creatively</h3> <ul> <li><strong>Shoot Through Elements:</strong> Try shooting through leaves, flowers, fences, or sheer curtains. This can add interesting foreground bokeh (blurred elements) and create a sense of depth or mystery.</li> <li><strong>Reflective Surfaces:</strong> Look for puddles, wet pavement, or large windows to capture reflections of your subject. This adds a unique artistic element to your portraits.</li> <li><strong>Shadow Play:</strong> Instead of avoiding shadows, use them creatively. Look for patterns created by trees, blinds, or architectural elements and incorporate them into your composition to add drama and interest.</li> </ul> <h3>Work with Artificial Light Alongside Natural Light</h3> <ul> <li><strong>Mixing with Ambient Indoors:</strong> Use a simple LED light panel or even a desk lamp to add a subtle kick of light, especially in darker indoor natural light situations. Position it to complement the natural light, perhaps as a fill light or a hair light.</li> <li><strong>Fairy Lights/String Lights:</strong> These can add magical bokeh and a warm, dreamy atmosphere to evening portraits, especially when placed in the background or wrapped around your subject.</li> </ul> <h3>Consider Post-Processing to Enhance Natural Light</h3> <p>Even the best natural light can be enhanced with a little post-processing. You don't need complex software; even basic editing on a smartphone can make a difference.</p> <ul> <li><strong>Adjust Exposure and Contrast:</strong> Brighten or darken your image, and add contrast to make the subject pop.</li> <li><strong>White Balance Correction:</strong> Fine-tune the colour temperature to ensure skin tones look natural and pleasing.</li> <li><strong>Highlight and Shadow Recovery:</strong> Bring back detail in overly bright areas (highlights) or overly dark areas (shadows).</li> <li><strong>Clarity and Vibrance:</strong> These sliders can add a subtle punch to your image without over-saturating colours.</li> </ul>
<h2>How To Take Portraits In Natural Light FAQ</h2> <details class="faq-item"><summary>What is the best time of day for natural light portraits?</summary><div class="faq-answer">The <strong>Golden Hour</strong> (the hour after sunrise and the hour before sunset) is widely considered the best due to its soft, warm, and flattering light. Overcast days also provide excellent soft, even light throughout the day.</div></details> <details class="faq-item"><summary>Can I take good natural light portraits at midday?</summary><div class="faq-answer">It's challenging but possible. Midday sun is very harsh and creates strong shadows. To avoid issues, shoot in <strong>open shade</strong>, use a large <strong>diffuser</strong> to soften the light, or embrace the dramatic, high-contrast look that midday sun provides, using shadows creatively.</div></details> <details class="faq-item"><summary>Do I need a fancy camera to take good natural light portraits?</summary><div class="faq-answer">No. While professional cameras offer more control, excellent portraits can be taken with any camera, including a smartphone. The key is understanding light and composition, not just the gear. Many smartphones now have portrait modes that use computational photography to mimic shallow depth of field.</div></details> <details class="faq-item"><summary>How do I get a blurred background with natural light?</summary><div class="faq-answer">To achieve a blurred background (bokeh), use a lens with a wide <strong>aperture</strong> (a small f-number like <strong>f/1.8</strong>, <strong>f/2.8</strong>, or <strong>f/4</strong>). Also, increase the distance between your subject and their background, and get closer to your subject yourself.</div></details> <details class="faq-item"><summary>What if I don't have a reflector?</summary><div class="faq-answer">You can use household items! A large piece of white card, a white sheet, a piece of foil-covered cardboard, or even a light-coloured wall can act as an effective reflector to bounce light onto your subject and fill in shadows.</div></details> <details class="faq-item"><summary>How important is eye contact in natural light portraits?</summary><div class="faq-answer">Eye contact can be very powerful and engaging, drawing the viewer directly into the subject's world. However, not all portraits require it. Looking off-camera can create a sense of candidness, introspection, or storytelling, offering a different mood and feeling to the image. Experiment with both to see what works best for your vision.</div></details>
<h2>Final Checklist for How To Take Portraits In Natural Light</h2> <ul> <li><p><strong><span class="howto-icon howto-icon-checkbox" aria-hidden="true"></span> Light Quality Checked:</strong> Have you found soft, flattering light (open shade, Golden Hour, overcast)?</p></li> <li><p><strong><span class="howto-icon howto-icon-checkbox" aria-hidden="true"></span> Location Chosen:</strong> Is the background appealing and does it complement the light?</p></li> <li><p><strong><span class="howto-icon howto-icon-checkbox" aria-hidden="true"></span> Camera Settings Dialled In:</strong> Is your aperture set for the desired depth of field? ISO as low as possible? White Balance appropriate?</p></li> <li><p><strong><span class="howto-icon howto-icon-checkbox" aria-hidden="true"></span> Subject Comfort and Direction:</strong> Is your subject relaxed? Have you given clear, gentle instructions for posing?</p></li> <li><p><strong><span class="howto-icon howto-icon-checkbox" aria-hidden="true"></span> Focus on Eyes:</strong> Is your focus point accurately placed on the subject's closest eye?</p></li> <li><p><strong><span class="howto-icon howto-icon-checkbox" aria-hidden="true"></span> Reflector/Diffuser Ready (if needed):</strong> Have you used a tool to shape or soften the light?</p></li> <li><p><strong><span class="howto-icon howto-icon-checkbox" aria-hidden="true"></span> Review and Adjust:</strong> Have you checked your LCD screen for exposure, focus, and shadows?</p></li> <li><p><strong><span class="howto-icon howto-icon-checkbox" aria-hidden="true"></span> Experiment and Enjoy:</strong> Are you trying different angles, expressions, and light conditions?</p></li> </ul> </div>


